The history of this location is so deep that you could easily spend multiple days seeing and learning about everything on the grounds.
That's why we've decided to create a self-guided Edinburgh Castle tour to help visitors experience the most noteworthy areas of the property.
The route of this self-guided tour is very similar to the one we offered in the following virtual tour of the castle, led by one of our best guides, Margaret.
You can take a virtual tour of the castle with Margaret from Tours by Foot in this video below.
Introduction
You have chosen to take a stroll through one of Scotlands most iconic buildings.
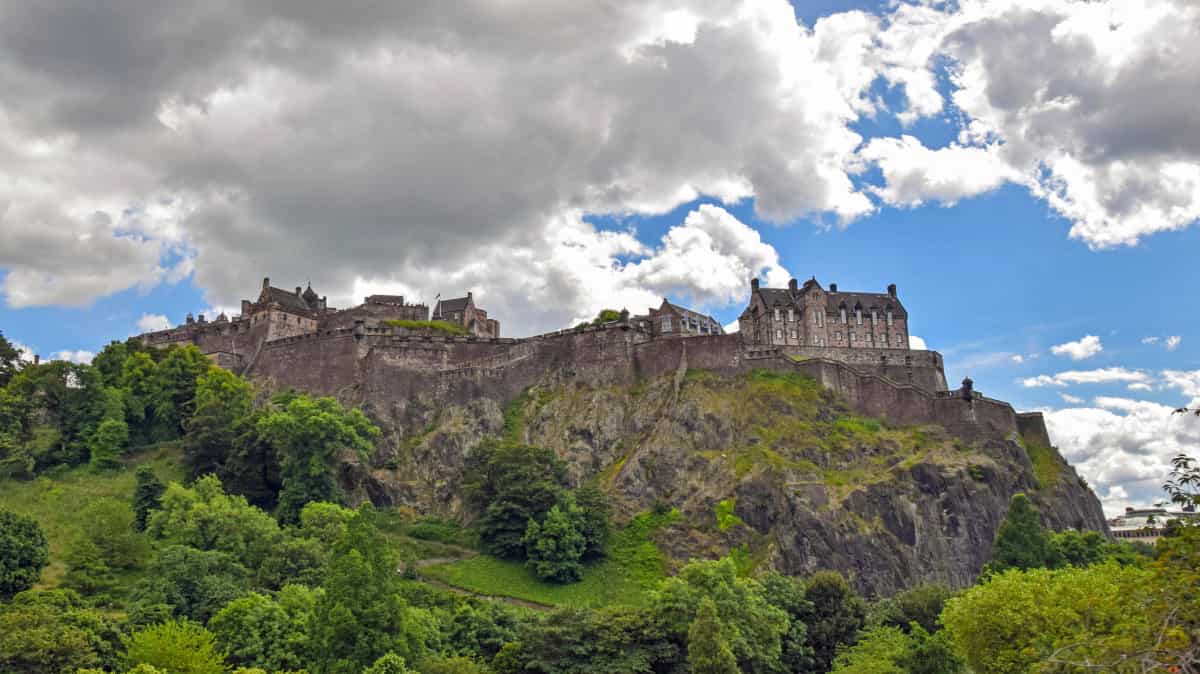
Perched atop an extinct volcano, Edinburgh Castle occupies some of the oldest inhabited ground in the city.
With a tumultuous history dating back over 1,000 years, this is one of the most besieged locations in Great Britain.
It served a role as one of Scotland’s most important strongholds, and fending off attackers from the War of Scottish Independence in the 14th century through to the Jacobite rising of 1745.
Used as a royal home from the reign of King David I in the 12th century until 1633, the castle’s later life saw its use as military barracks and garrison.
Today, the castle complex is full of compelling secrets, sacred artefacts and various points of interest such as St. Margaret’s Chapel, Mon's Meg, the Royal Palace with Great Hall (where the Honours of Scotland are kept) and the National War Museum of Scotland.
Your tour will take you around 2 - 3 hours, depending on how much of the various museums you wish to explore, or breaks you wish to take.
For guests with mobility issues, or those with prams or buggies, the majority of the castle is fully accessible and any of the friendly staff you come across will be glad to assist you should you need it.
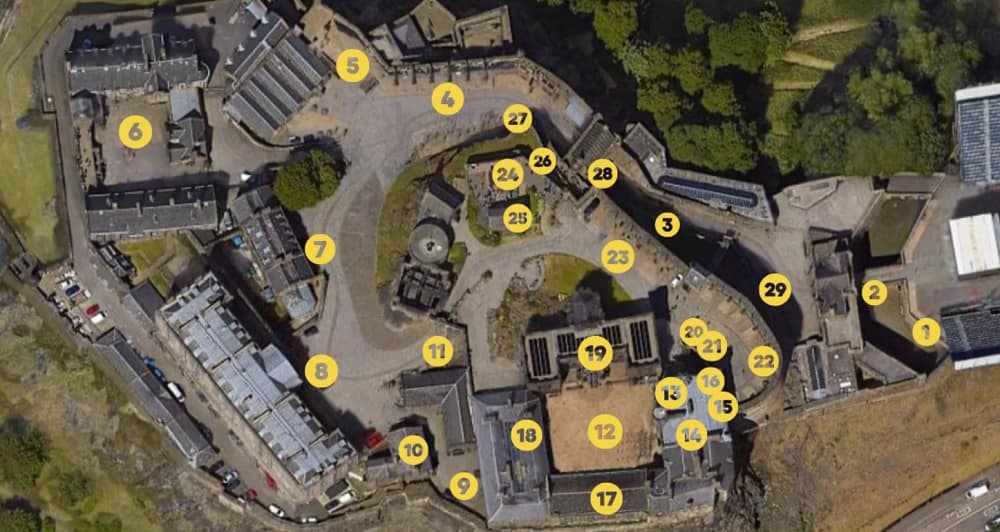
Your self-guided tour begins just outside Edinburgh Castle on the large paved area known as the Esplanade.
Find yourself a nice place to stand, near either side of the Esplanade, ideally, so you can get a good view of the city below you, and begin.
We also offer an 25-stop audio tour of historic Edinburgh, researched, written, and recorded by one of our own tour guides, that you could take whenever you wish.
- Purchase an audio tour
- Get a confirmation email with .mp3, pdf, and embeddable Google Map
- Enjoy the tour(s).
Edinburgh Castle Opening Hours
- 1st April - 30th September: 9:30 am to 6:00 pm (last entry 5 pm)
- 1st October - 31st March: 9:30 am to 5:00 pm (last entry 4 pm)
- The Castle is closed on the 25th and 26th of December
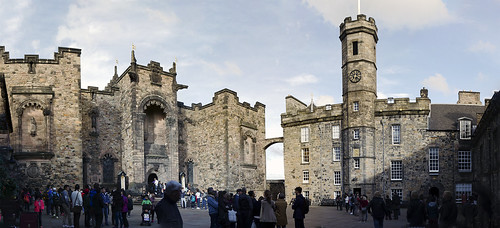
STOP 1 - ESPLANADE
Our tour begins at the Esplanade, an open area erected in 1753 on Castle Rock, towering 260 feet above the city of Edinburgh.
This site holds a somber history, once serving as an execution ground, particularly for those accused of witchcraft.
The Witches Well memorial on the Esplanade pays homage to the hundreds who met their tragic end here.
As we stand at the top of the Royal Mile, above ancient volcanic rock, it's clear that the castle occupies one of Edinburgh's oldest continuously inhabited sites.
While its origins trace back to at least 972 BC, the castle we see today took shape in the 12th century under King David I's reign, eventually earning recognition as Scotland's paramount stronghold by 1633, per King James VI.
Head towards the Gatehouse entrance as we delve deeper into the castle's storied past.
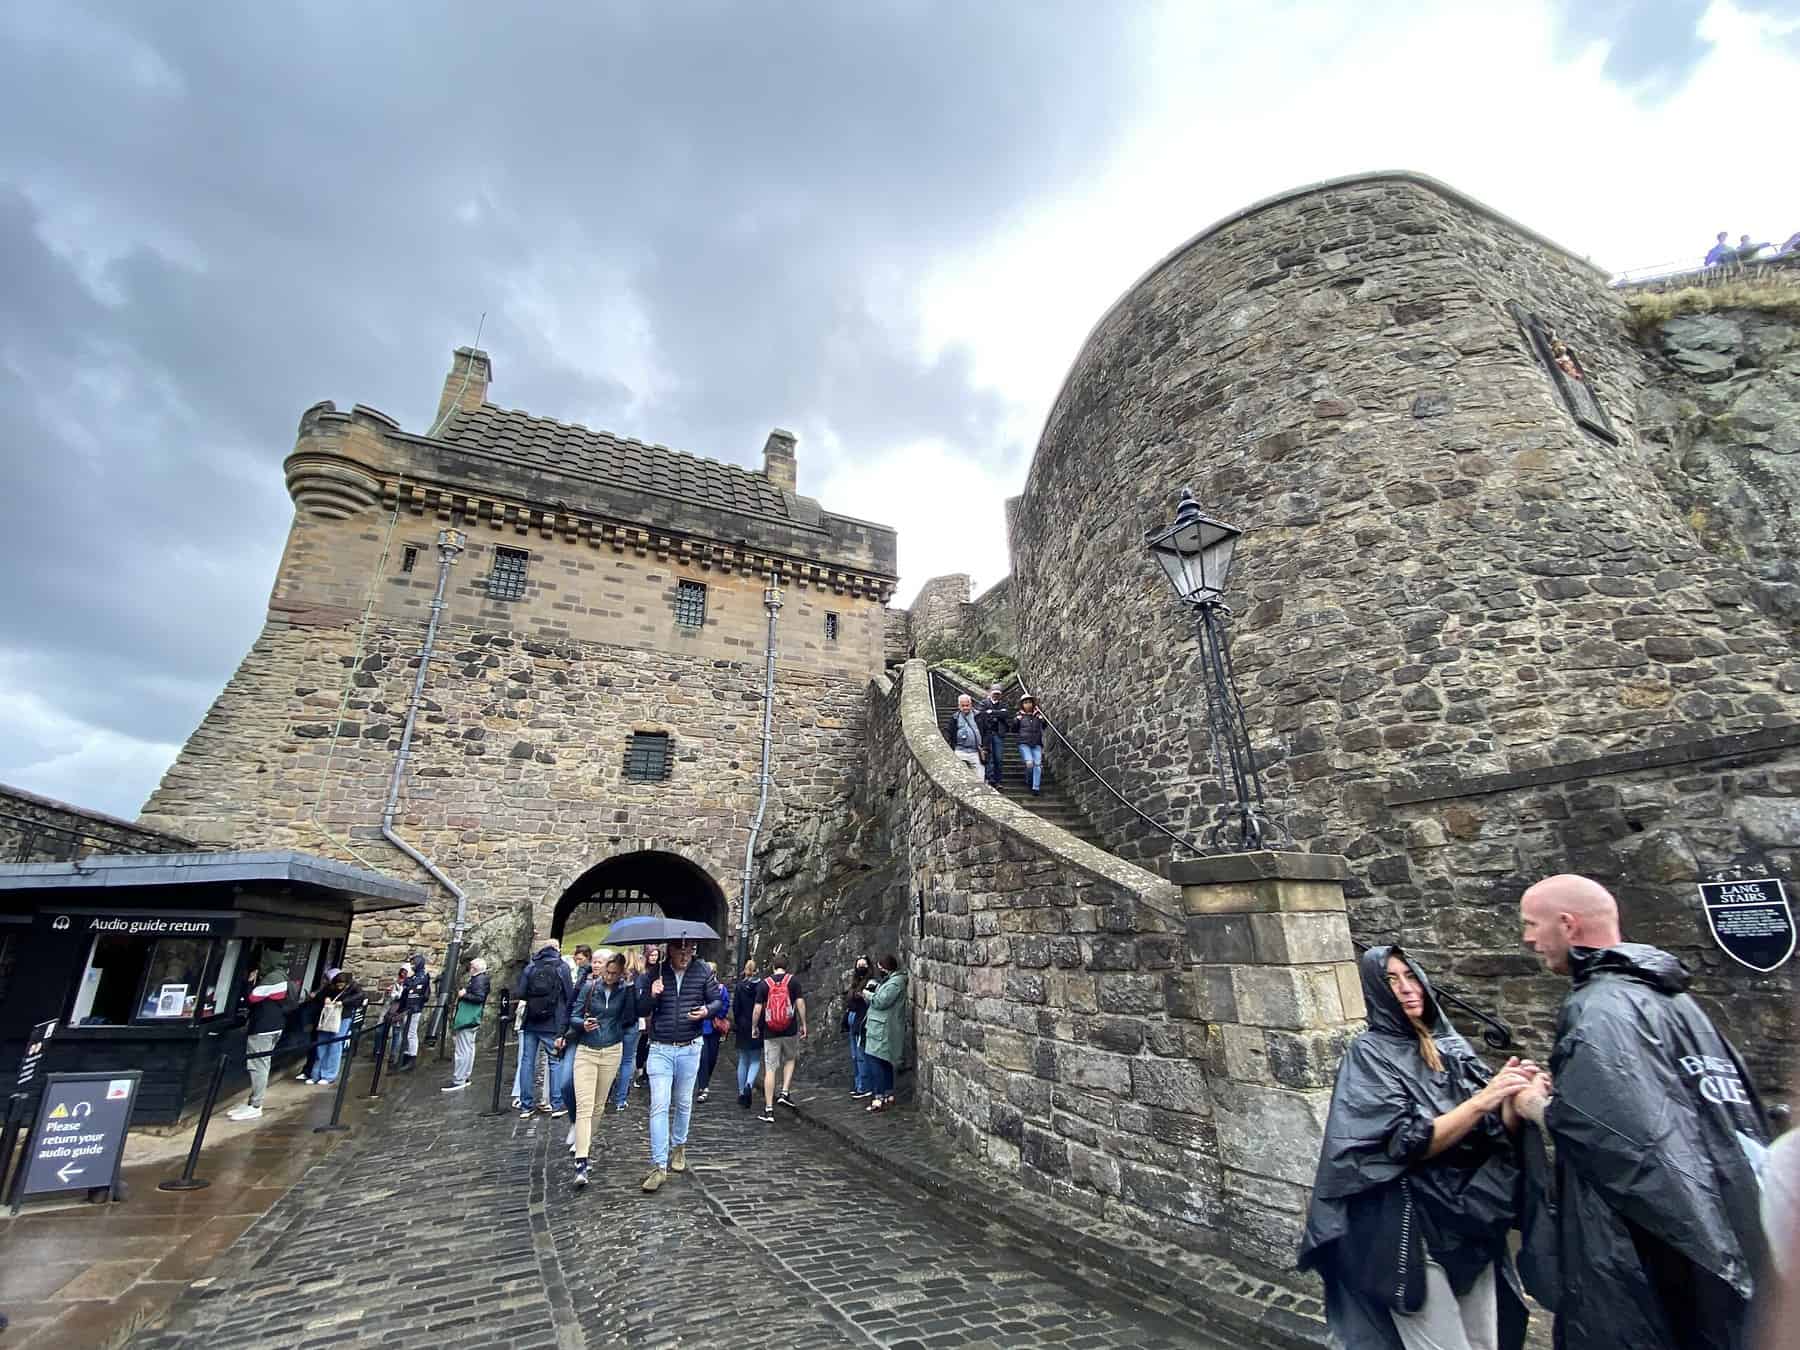
STOP 2 - GATEHOUSE
As we approach the Gatehouse, constructed in 1888, take note of its Victorian-era design, crafted to emulate a traditional castle aesthetic from an earlier age.
This addition was a deliberate effort to evoke a sense of authenticity in the building's appearance.
In 1929, bronze statues honoring King Robert the Bruce and Sir William Wallace were installed, marking the 600th anniversary of Bruce's passing.
Above the archway, the inscription "Nemo me impune lacessit" translates to "no one provokes me with impunity," which was the motto for the Stuart dynasty, the Order of the Thistle, and Scottish regiments within the British Army.
Pass through the gates ahead, continuing straight, then veer right along the path as we delve deeper into the historical tales of this site.
STOP 3 - PORTCULLIS GATE AND INNER BARRIER
While officially entering the castle, it's essential to acknowledge the centuries of conflict and sacrifice that characterized its history, with at least 26 recorded attempts to breach its defenses.
The path we tread was once a vital road leading directly into the fortress, established in 1464 to facilitate the transportation of cannons.
Notice the granite strip in the center, designed to enhance traction for horses.
To the right stands a building that has served as both a guardhouse and a prison, while the square structures ahead mark the original gatehouse's location.
Constructed in the 1570s, the gatehouse features the Scottish Royal Arms, including the Lion Rampant, while its spiked portcullis adds to its imposing presence.
Beneath our feet lie remnants of history.
In 1989, the remnants of 15 skeletons that date back to the Jacobite Rising of 1689 were discovered here, a poignant reminder of the castle's tumultuous past.
Head towards the cannons aligned against the wall to your right, as we delve further into the castle's rich tapestry of stories and conflicts.
STOP 4 - ARGYLE BATTERY
Named after the 2nd Duke of Argyle, this six-gun artillery battery, constructed in the 1730s, overlooks stunning views of Edinburgh New Town and the Firth of Forth.
While the cannons you see today are replicas from 1810, they symbolize King George III's reign.
Positioned to face north, they commemorate a significant moment in Scottish history.
In 1296, Edinburgh Castle fell to English forces during the First War of Scottish Independence.
However, in a daring nighttime maneuver in March 1314 led by Thomas Randolph (Earl of Moray) and a team of 30 men (including William Francis) scaled Castle Rock undetected, surprising and reclaiming the castle from the English.
This victory not only lifted Scottish morale, but also set the stage for subsequent triumphs, notably the decisive Scottish victory at the Battle of Bannockburn.
Despite this success, the castle's strategic significance led King Robert the Bruce to order its destruction to prevent further English occupation.
However, the English rebuilt it after their reoccupation in 1335, only to lose it again to Scottish forces led by Sir William Douglas in 1341, marking another chapter in the castle's storied past.
STOP 5 - Extra Details
Disguised as sailors and merchants, Sir William Douglas and his lieutenants orchestrated a daring ruse to reclaim Edinburgh Castle.
Pretending to deliver supplies, they concealed trained soldiers within carts and wagons covered in burlap, cloth, and hay.
As they approached the castle gates, the unsuspecting English sentries, anticipating the delivery, allowed them entry.
However, as the last wagon halted, blocking the closing of the portcullis gate, the signal was given, and Scottish soldiers sprang into action.
Engaging in a fierce assault, they overwhelmed the English garrison, with reinforcements pouring in to secure the castle.
In a swift and decisive victory, the Scots reclaimed their stronghold, driving out the English occupants and restoring control to their own hands.
With Castle Rock's ledge behind you, proceed towards the prominent gun positioned in the corner to continue our exploration.
STOP 6 - 1 O’Clock Gun
Next to the Argyle battery lies Mill’s Mount Battery, housing the iconic One O’Clock Gun, a daily time signal fired precisely at 1 PM (except on Sundays).
Despite its intended purpose as a timekeeping aid, the gun saw combat just once, during a German Zeppelin air raid on April 2, 1916, though it failed to hit its target.
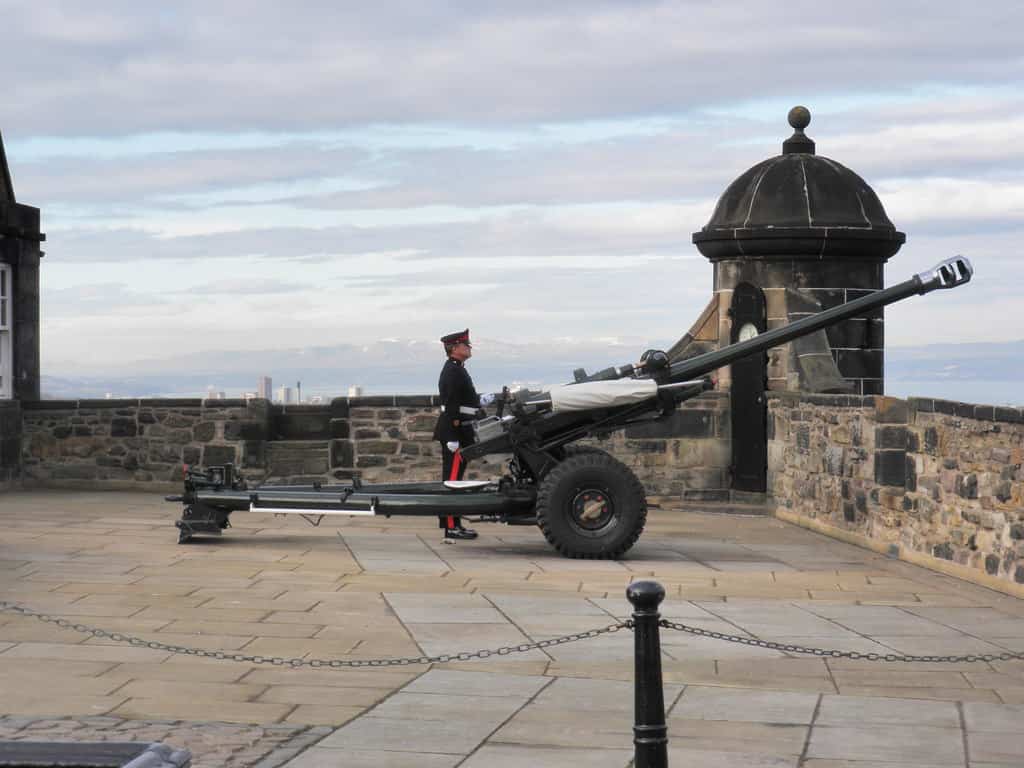
Today, the gun serves as a historical attraction, delighting visitors with its daily firing.
Don't miss the opportunity to witness this tradition during your visit.
With the One O’Clock Gun to your right, proceed forward past the café, then follow the descending pathway to reach the open square featuring the equestrian statue at its center.
STOP 7 - HOSPITAL SQUARE AND WAR MUSEUM
Hospital Square, named for the hospital erected here in 1898 and now housing the National War Museum, serves as a poignant reminder of Scotland's military history.
At its heart stands an imposing statue of Field Marshal Earl Haig, overlooking the museum that delves into the nation's military legacy spanning 400 years.
Inside, visitors encounter a treasure trove of artifacts, from Gaelic Bibles recovered from battlefields to regimental bagpipes and medals.

Notable among these is the story of Bob, the regimental pet of the 1st Battalion Scots Fusilier Guards, who earned a medal for bravery during the Crimean War.
After exploring the museum, consider ascending to Butt’s Battery for panoramic views of the city's west.
When ready to proceed, return up the pathway and turn right towards the prominent stone house ahead, marking our next destination.
CLIP 8 - GOVERNOR'S HOUSE
Situated atop Hawk Hill, you're greeted by a charming Georgian building constructed in 1742 to accommodate the castle's governor, storekeeper, and master gunner.
Although its usage transitioned over the years, including serving as quarters for hospital nurses, the building returned to its original purpose in 1936 when the role of governor was reinstated as an honorary title for the General Officer Commanding land forces in Scotland.
Currently functioning as the governor's office and officers mess, it remains off-limits to the public.
As you stand with the Governor's House to your right, ascend the hill until you reach the prominent stone building, likely with parked cars, signaling our next stop.
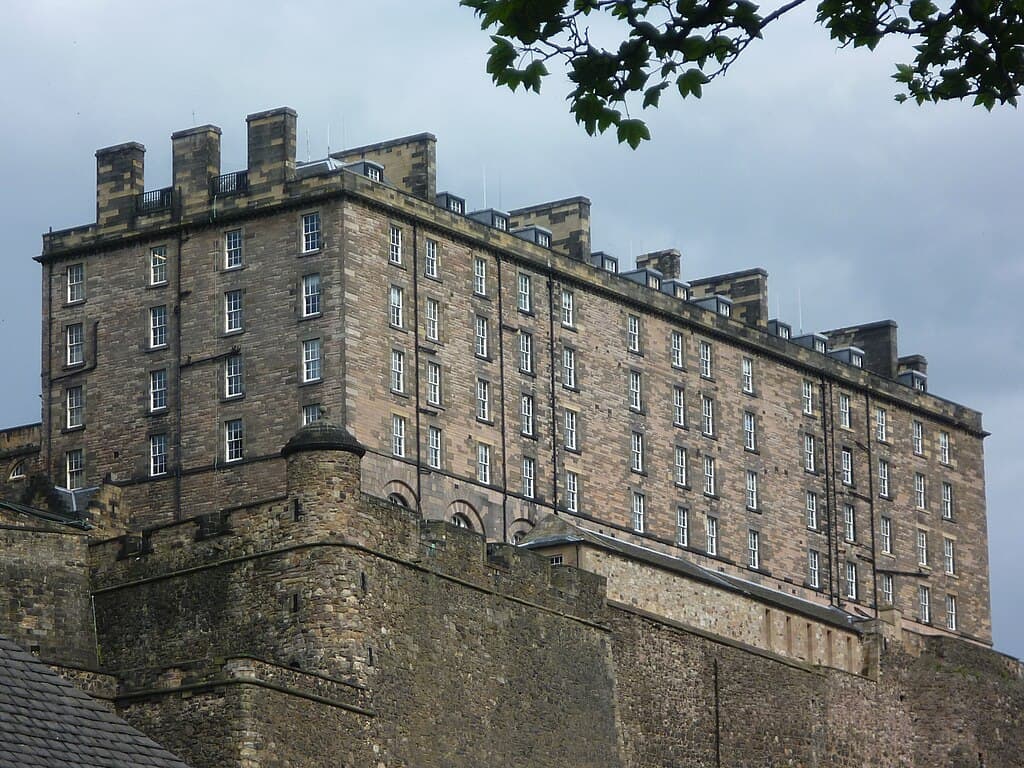
STOP 9 - THE NEW BARRACKS AND REGIMENTAL MUSEUM
The New Barracks, erected in the 1790s as a response to Napoleon's expanding influence, accommodated nearly 1,200 troops by 1799 amid fears of a Napoleonic invasion.
Despite its historical significance, its architectural appeal has been subject to criticism, with Sir Walter Scott likening its appearance to that of a "vulgar cotton mill."
Over time, the barracks underwent modifications, housing 650 men by 1906, though amenities remained scarce, with just six baths for their use and no lavatories.
While much of the building remains inaccessible to the public, the Regimental Museum of the Royal Scots Dragoon Guards awaits exploration on the left side.
Inside, visitors encounter a rich collection of over 1,000 pieces of regimental memorabilia, including weapons, flags, medals, paintings, and uniforms.
After visiting the museum, turn left towards the stone buildings ahead, descending down a sloping path to access the entrance directly ahead or play the next clip while en route.
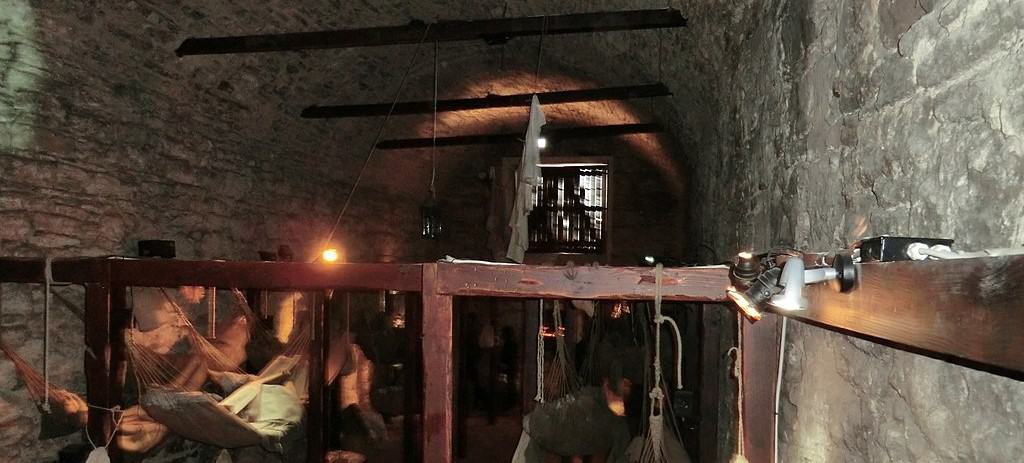
STOP 10 - PRISONS OF WAR
The vaults you're now entering have a storied past, serving as prisons for pirates and prisoners of war during the 17th and 18th centuries.
The grim conditions endured by inmates, ranging from Scottish Wars of Independence captives to those from the Jacobite Risings, are vividly depicted through the display inside.
Notable among the prisoners were French privateers captured during the Seven Years War and American sailors held during the American War of Independence, with one carving what's believed to be an early depiction of the American flag on a cell door.

Despite international regulations mandating reasonable conditions, the vaults remained cramped and grim, with up to 1,000 men sharing meager accommodations and surviving on limited rations.
The prisoners' ingenuity shone through in their crafting of wooden items, some of which are still on display, showcasing their attempts to pass the time amidst the boredom and harsh realities of confinement.
The vaults witnessed numerous escape attempts, some successful, others tragic, leading to their closure as a prison in 1811.
Upon exiting, head straight towards the nearby building, where stairs lead down to a Victorian military prison, continuing our exploration of Edinburgh Castle's intriguing history.
STOP 11 - MILITARY PRISON
The Victorian military prison, constructed in 1842, served as a disciplinary facility for offending soldiers of the garrison until its last use in 1923.
Featuring eight solitary confinement cells, soldiers found themselves confined here for offenses like drunkenness on guard duty.
In addition to imprisonment, soldiers often faced hard labor tasks, such as carrying cannonballs or performing exercise drills.
While the prison's conditions were stark, it boasted proper ventilation, central heating, and basic amenities, making it relatively comfortable compared to other Victorian prisons.
After exploring the prison and witnessing displays depicting the soldiers' charges and punishments, exit the facility and return up the path toward the New Barracks.
Take a sharp right turn and ascend the hill towards the stone walls, pausing just outside for our next destination.
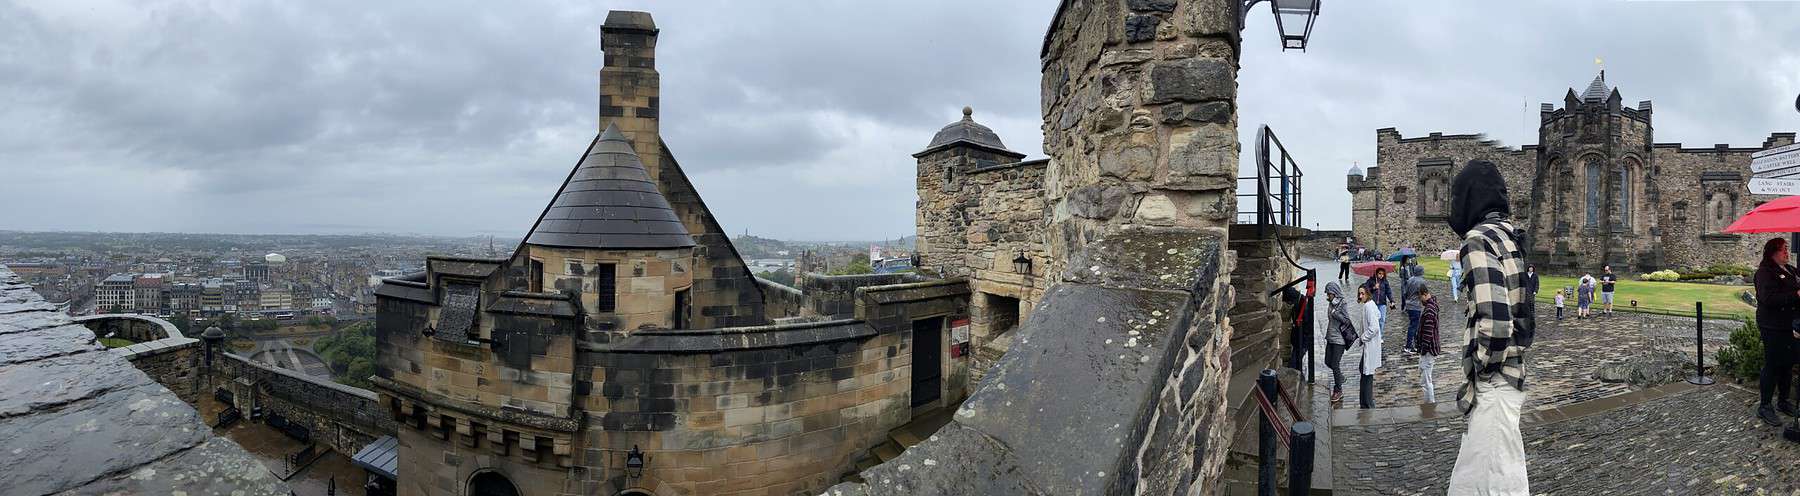
STOP 12 - FOOG’S GATE AND UPPER WARD
As you progress deeper into the castle complex, you're nearing the heart of Castle Rock, known as the Upper Ward or Citadel, where iconic landmarks such as the Royal Palace, the Great Hall, the National War Memorial, and the historic St. Margaret’s Chapel await exploration.
To reach this central area, you'll pass through Foog’s Gate, constructed during a significant renovation overseen by King Charles II in the 1600s.
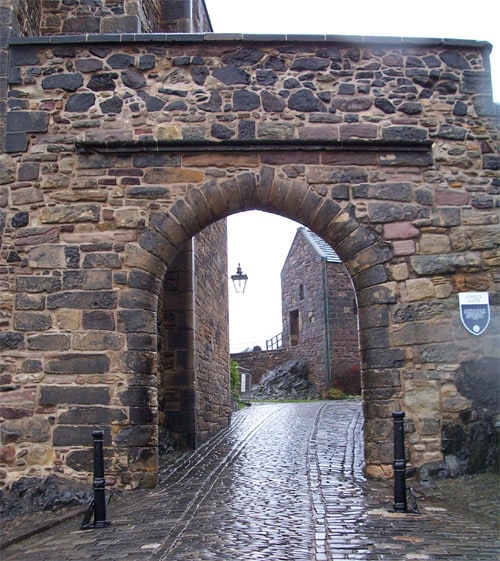
While the origin of the gate's name remains a mystery, some speculate it may refer to the dense sea fogs, locally known as haars, that often envelop the castle.
Pass through Foog’s Gate and veer right at the first opportunity, following the path until you reach Crown Square, your next destination nestled between two stone buildings on the left.
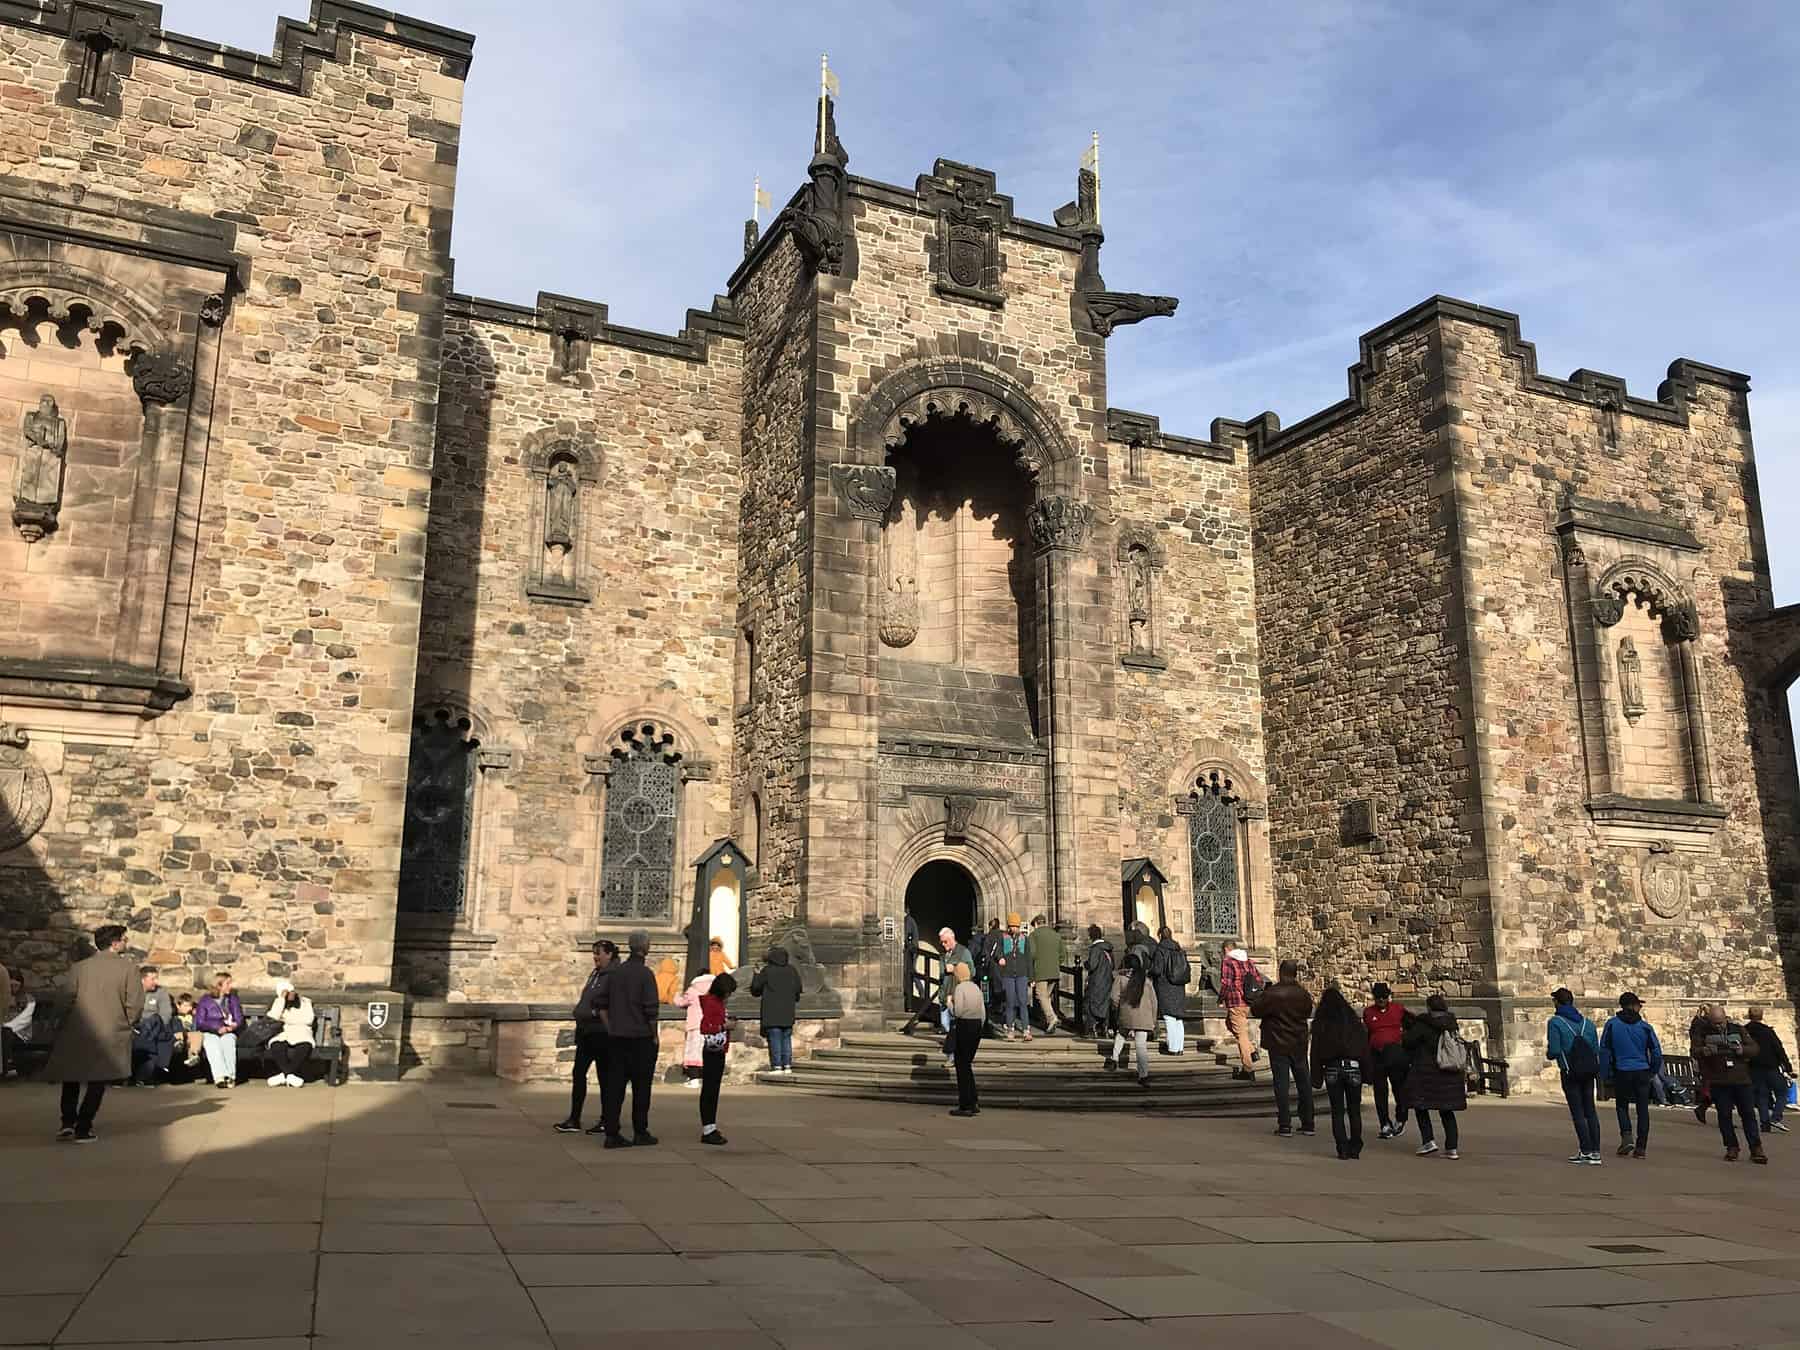
STOP 13 - CROWN SQUARE
You're currently standing in Crown Square, also referred to as Palace Yard, a courtyard established in the 15th century by King James III.
Beneath your feet lie the vaults housing the earlier visited prison, where notable prisoners were once held.
Directly ahead stands the old Royal Palace, while the Great Hall resides to your right, the Queen Anne Building behind, and the Scottish National War Memorial to your left.
Our first stop will be the Royal Palace to view the Honours of Scotland.
Simply follow the signage leading you to the Honours of Scotland exhibit, and play the next clip as you proceed indoors.
STOP 14 - HONOURS OF SCOTLAND
The Honours of Scotland, also known as the Scottish Crown Jewels, are housed in the Crown Room and stand as the oldest Crown Jewels in Britain, surviving the destruction of England's jewels during the Civil War.
Comprising a crown, sceptre, and sword of state, these artifacts are crafted from gold, silver, and precious gems, with the crown itself fashioned from Scottish gold and silver, adorned with 43 gemstones and 69 freshwater pearls.
While the crown, remodelled for James V, is used in royal ceremonies, including the Scottish Parliament openings and Queen Elizabeth II's funeral, the sceptre's origin, likely a papal gift to James IV, remains uncertain.
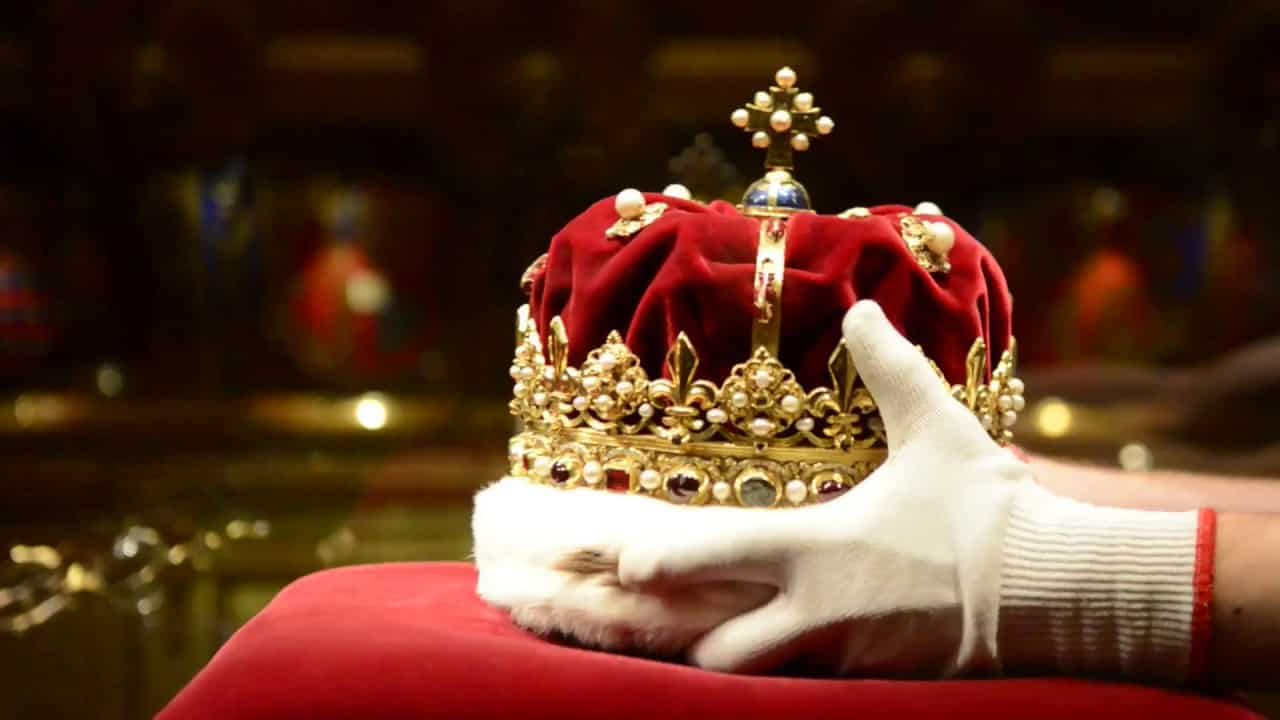
These historic items, first used at the coronation of Mary Queen of Scots in 1543, carry tales of intrigue, including their concealment from Oliver Cromwell's army and their rediscovery in 1818 by a team led by Walter Scott.
Alongside the Honours of Scotland rests the Stone of Scone, integral to Scottish coronations since the 1200s and later seized by Edward I, becoming a symbol of English conquest until its return to Scotland in 1996.
Follow the signs into the Royal Palace to delve deeper into Scotland's regal heritage.
STOP 15 - ROYAL PALACE
The Royal Palace, originally initiated by King James IV in the mid-15th century, underwent substantial rennovation in 1617 under the reign of his great-grandson, King James VI.
The interiors largely reflect this period, with the first room displaying the Royal Family Tree of Mary, Queen of Scots, and her son, emphasizing their pivotal role in establishing the Stuart dynasty.
Among the portraits adorning the walls, Anne of Denmark and James VI feature prominently, the latter depicted as an infant following his forced ascension to the throne due to his mother's abdication, which was orchestrated partly due to her second husband's untimely demise under mysterious circumstances.
The chamber adjacent to the main room holds historical significance as it witnessed the birth of Mary's only surviving child, James, on June 19, 1566.
Despite the joyous occasion, Mary's life was fraught with political turmoil and personal tragedy, from failed marriages to imprisonment and eventual execution.
Decorative symbols within the chamber, including the Scottish royal Coat of Arms, commemorate James's birth and anticipate his future reign.
As visitors explore the palace's rich history, portraits spanning generations offer glimpses into the tumultuous yet captivating lineage of the Stuart dynasty, culminating in the story of Charles Edward Stuart, the Young Pretender.
STOP 16 - NEEDLEWORK
Upon entering the antechamber, visitors are greeted with a blend of refurbished 17th-century features and original 15th-century elements, such as wooden panelling and a captivating fireplace adorned with King James VI's coat of arms.
Symbolism abounds in the room, with representations of Northern Ireland, England, Scotland, and France, along with Tudor references like the Portcullis adorning the plaster ceiling.

The centerpiece of the room is a glass display case showcasing a replica collection of 37 embroideries crafted by Mary Queen of Scots during her imprisonment and exile in England, each piece bearing its own unique narrative, including one believed to symbolize the dynamic between Queen Elizabeth I and Mary.
The embroideries, painstakingly recreated over three years by 33 volunteers, offer insights into Mary's tumultuous life and the political intrigues of her time.
As visitors marvel at the intricacies of these needlework masterpieces, they are invited to proceed through the door to the left and continue their journey through the chambers of Edinburgh Castle.
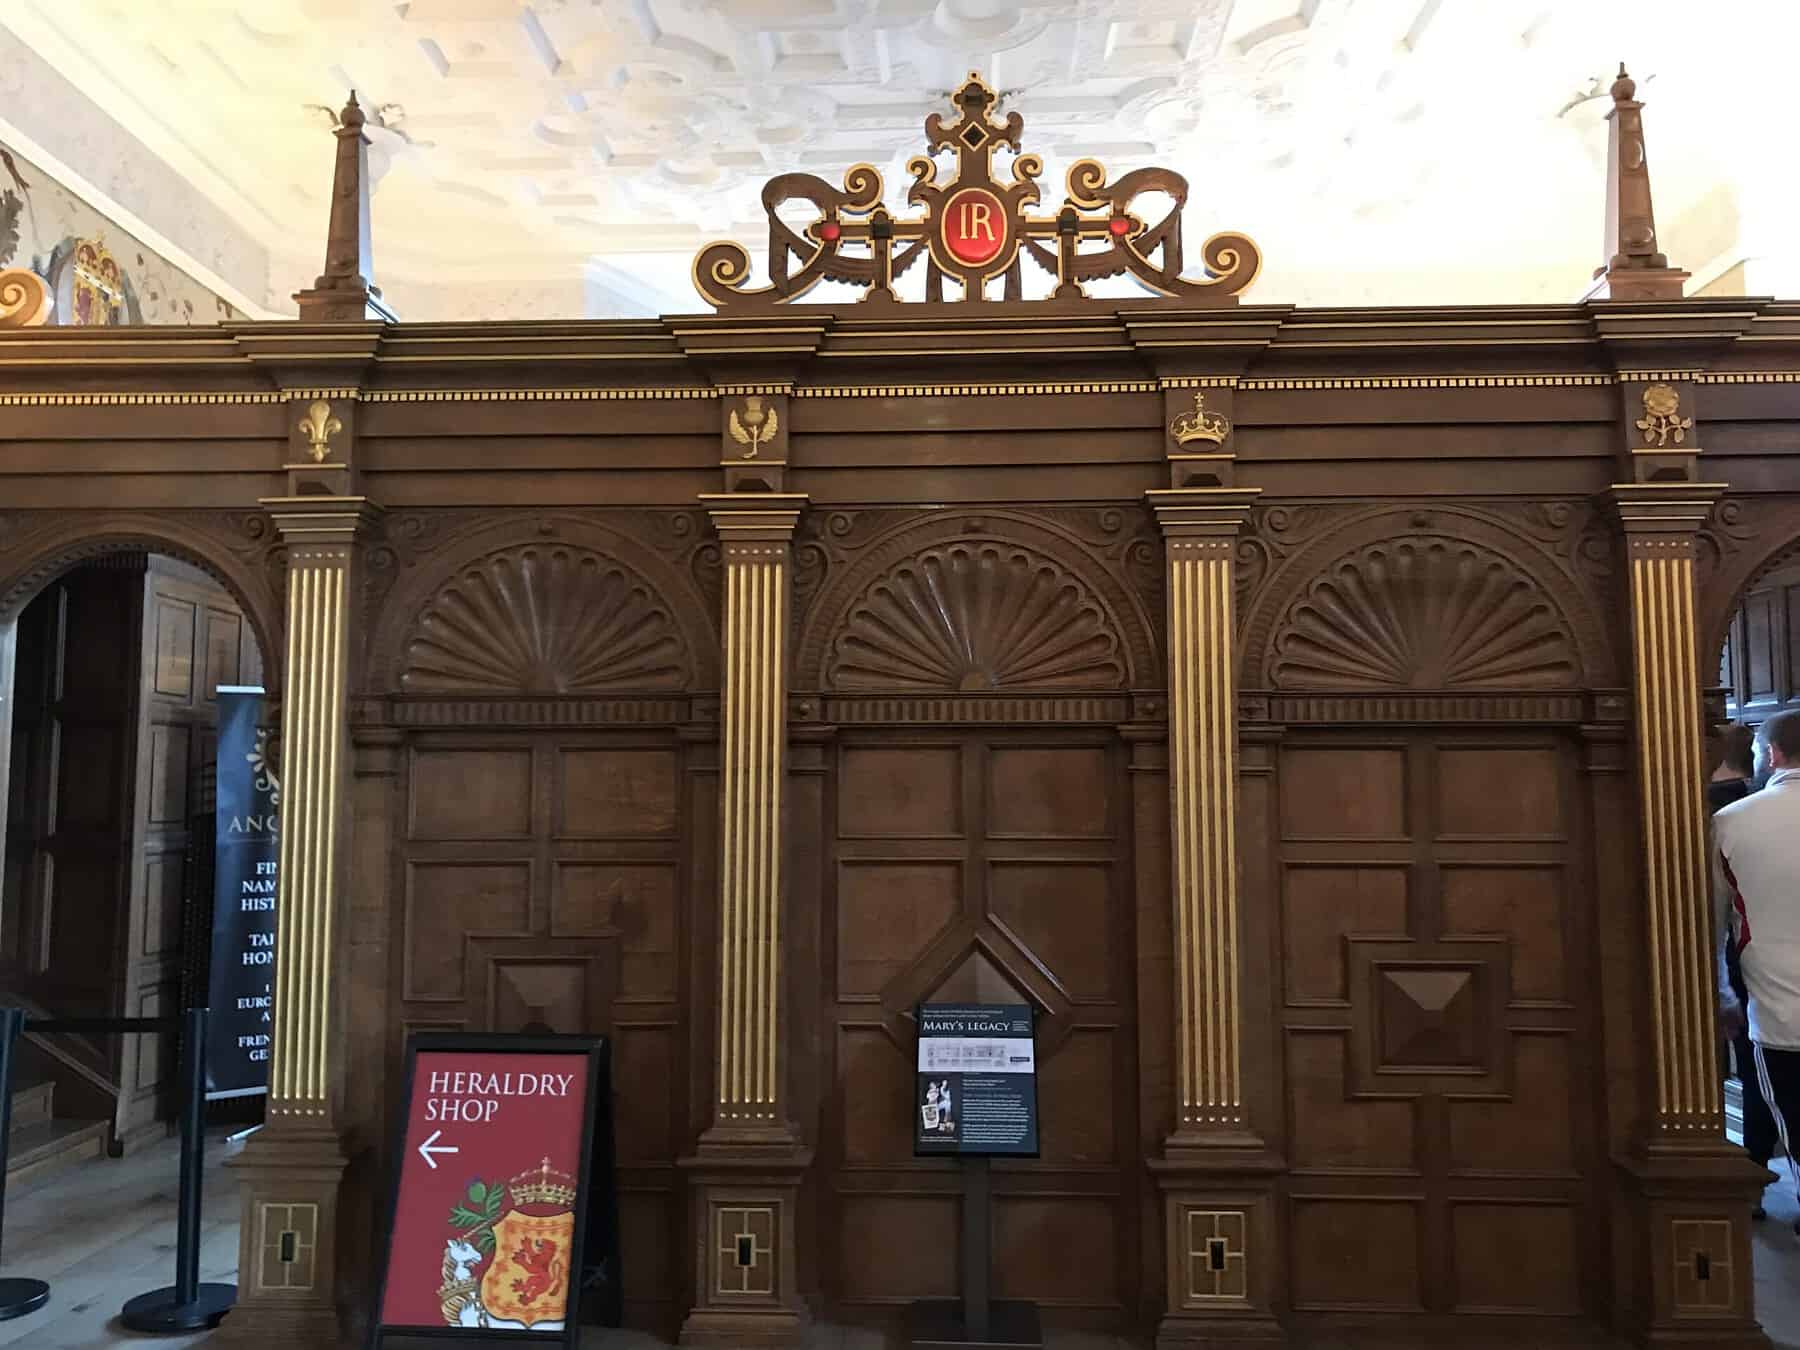
STOP 17 - LAICH HALL
The Laich Hall, or low hall, served as an intimate yet grand space for entertaining the closest guests and family of the sovereign.
Refurbished to resemble its 1610s appearance, the hall features recent panels and large windows added to enhance natural lighting.
Originally built for King James and his entourage, the hall later served as a storeroom and soldiers' bar as the castle transitioned to military use in the late 1600s, showcasing a blend of royal luxury and practical military function.
Despite King James holding only one banquet here to celebrate his Golden Jubilee, the Low Hall continues to host state occasions today, with its decorative ceiling and symbolic wooden screen reflecting its regal heritage.
The wooden screen, adorned with James's initials and heraldic symbols, stands as a modern reproduction of the original, which once concealed servants' workspaces and dirty dishes.
Visitors are invited to exit the hall through the right side of the wooden panel, ascending a set of stairs to return to Crown Square.
From there, a walk under the imposing stone archway leads to the next destination: the Great Hall, where visitors can explore further into Edinburgh Castle's rich history.
STOP 18 - THE GREAT HALL
The Great Hall, originally constructed for King James IV in 1512, showcases a blend of original features and 19th-century refurbishments by Hyppolyte Blanc.
Despite its historical significance, King James himself had little opportunity to enjoy the grandeur, as he perished on the battlefield against his brother-in-law, King Henry VIII.
Inside, visitors are greeted with an impressive array of suits of armor and weaponry, including spears, swords, axes, pistols, and mortars, evoking the martial history of Scotland.
Among the notable features is a painting by Richard Ansdell depicting Charles Ewart's capture of a French regimental eagle during the Battle of Waterloo, commemorating a pivotal moment in British military history.
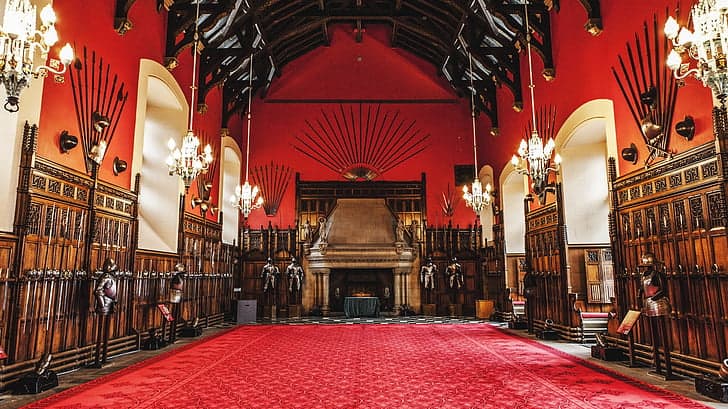
The hall's centerpiece, the Hammerbeam roof, remains a testament to its medieval origins, crafted from Norwegian wood and adorned with intricate heraldic imagery.
As visitors explore the Great Hall, they encounter the Laird's Lug, a discreet opening in the wall designed to allow the king to eavesdrop on court proceedings below.
This architectural curiosity adds to the hall's mystique, recalling centuries of royal intrigue and governance.
Over the years, the hall has served various functions, from hosting grand feasts for monarchs to accommodating soldiers during times of siege.
Despite its transformations, the Great Hall remains a cherished symbol of Edinburgh Castle's rich heritage, attracting visitors from around the world to marvel at its historic splendor.
STOP 19 - THE QUEEN ANNE BUILDING
The Queen Anne building, now utilized as a function space and education center, has a storied history dating back to the planned Jacobite invasion of 1708.
Intended as a response to France's support for James Francis Edward Stuart, the Old Pretender, the invasion ultimately failed when British naval forces intercepted the invading troops before they could disembark.
Edinburgh Castle's association with the Jacobites extends further, as evidenced by the siege of 1689 when it was the last bastion of support for the deposed King James VII.
Despite their efforts, the castle's defenders were eventually compelled to surrender, facing harsh consequences including the destruction of its rooftops.
In subsequent years, the vaults beneath the Queen Anne building served as a site of torture for failed Jacobite plotters, highlighting the ongoing conflict between supporters of the Stuart dynasty and the reigning monarchs.
One notable instance occurred when around 100 Jacobites attempted to seize the castle, only to be thwarted by a miscalculated rope ladder, leaving some trapped and subjected to brutal punishment.
This turbulent history underscores Edinburgh Castle's significance as a focal point of political and military struggles throughout the Jacobite period.
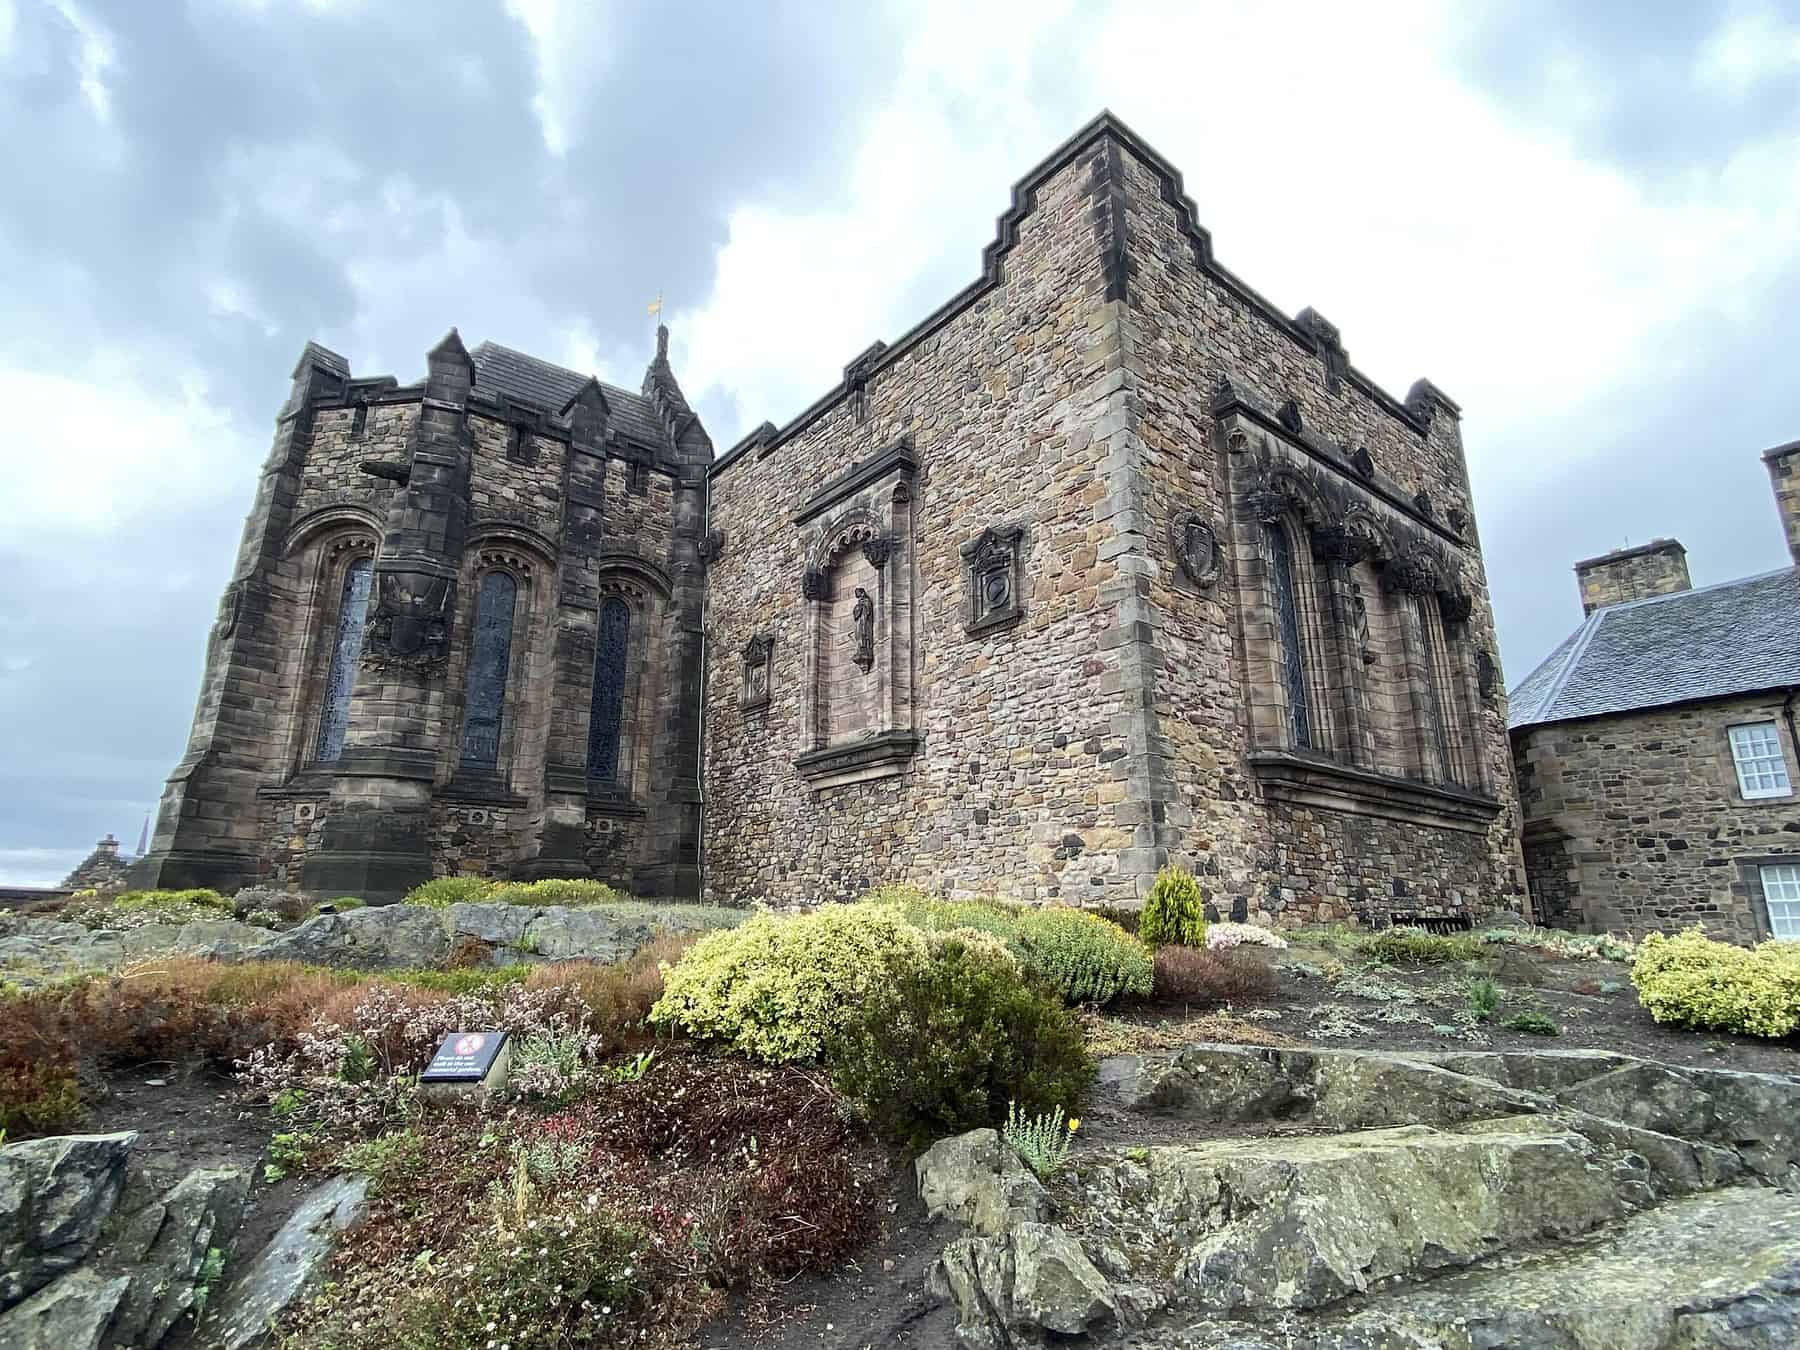
STOP 20 - SCOTTISH NATIONAL WAR MEMORIAL
The Scottish War Memorial stands on the historic site of the former Chapel Royal of King David II, dating back to 1366, later replaced by barracks in 1754.
Designed by architect Sir Robert Lorimer in the 1920s, the memorial initially honored those who perished in World War I, later extending its commemoration to include casualties of World War II and subsequent conflicts.
Adorned with intricate symbolism, the exterior features a phoenix symbolizing rebirth and stone figures representing Courage, Peace, Mercy, and Justice, crowned by stone lions bearing the St. Andrews flag of Scotland.
Hidden within the memorial's design are additional animal motifs, including an elephant, greyhound, vulture, horse, ox, eagle, lamb, and tiger, each symbolizing various virtues and vices.
Within the sacred chamber atop the castle's volcanic rock, a wrought-steel casket guarded by bronze angels contains scrolls bearing the names of over 200,000 Scottish war casualties from World War I.
Portraying diverse military uniforms and equipment, the surrounding panels offer a comprehensive tribute to the fallen, while the space is overseen by a suspended figure of St. Michael, the guardian of soldiers.
STOP 21 - DAVID’S TOWER
To the left, under the towering stone archway from the War Memorial, a staircase descends towards David's Tower, marked by a small sign.
Dating back to the late 1300s, David's Tower was commissioned by King David II, son of Robert the Bruce, to bolster the castle's defenses and showcase royal strength.
Standing at 100 feet tall, it served as the primary royal residence within the castle for over a century, featuring royal chambers, a grand feasting hall, and a fighting platform encircled by battlements.

This photo of David's Tower in Edinburgh Castle is courtesy of Tripadvisor
Now reduced to underground ruins, it remains a testament to Scotland's oldest royal lodging, offering visitors a glimpse into its storied past.
Explore the subterranean remnants of David's Tower, a relic of medieval grandeur and strategic significance.
These dank depths echo with tales of royal occupancy and strategic fortification, including the infamous Black Dinner, which serves as inspiration for the Red Wedding in the Game of Thrones series.
If you're intrigued by history and intrigue, consider playing the optional clip for a deeper dive into the dramatic events that unfolded within these ancient walls.
STOP 22 - THE BLACK DINNER
In 1440, young King James II faced a threat from the powerful Douglas family, sparking a power struggle for control.
With his mother Joan and Archibald, 5th Earl Douglas as co-regents, Archibald's sudden death led to Sir William Chrichton, James Douglas (dubbed James the Fat), and Sir Alexander Livingston seizing control of the King and his court.
Sensing a threat from Archibald's son William, who inherited titles at 16, the regents devised a deadly trap.
Invited to dine at Edinburgh Castle, William and his brother David were falsely accused of treason, swiftly condemned, and beheaded, paving the way for James the Fat to inherit their titles.
This dark chapter in Scottish history unfolded as the young King James II witnessed the ruthless betrayal of his friends.
Despite his tearful pleas, the regents proceeded with the execution, securing their grip on power.
Yet, James II would eventually exact revenge, executing Sir Alexander Livingston and later orchestrating the downfall of James the Fat's family on the battlefield, seizing their lands and titles in 1455.
STOP 23 - THE FORE WELL AND HALF MOON BATTERY
The Lang Siege of Edinburgh Castle in 1573 led to the collapse of David's Tower, after nearly two years of conflict.
Sir William Kirkcaldy's defense, initially loyal to the regents, shifted to support Mary, Queen of Scots, but ended in surrender due to poisoned wells and relentless English artillery.

This photo of the Half Moon Battery in Edinburgh Castle is courtesy of Tripadvisor
The siege tactics, including poisoning wells and blockading streets, led to Kirkcaldy's defeat despite his posthumous pardon.
As visitors stand between the poisoned well and the National War Memorial, the journey through Edinburgh Castle's history unveils the resilience of its structures amidst centuries of conflict.
STOP 24 - TOWARDS ST MARGARET'S
Directly ahead stands St. Margaret’s Chapel, the oldest building in both Edinburgh Castle and the city itself, dating back to around 1130.
Built by King David I in honor of his mother, Queen Margaret, the chapel served as a royal place of worship since the 12th century.
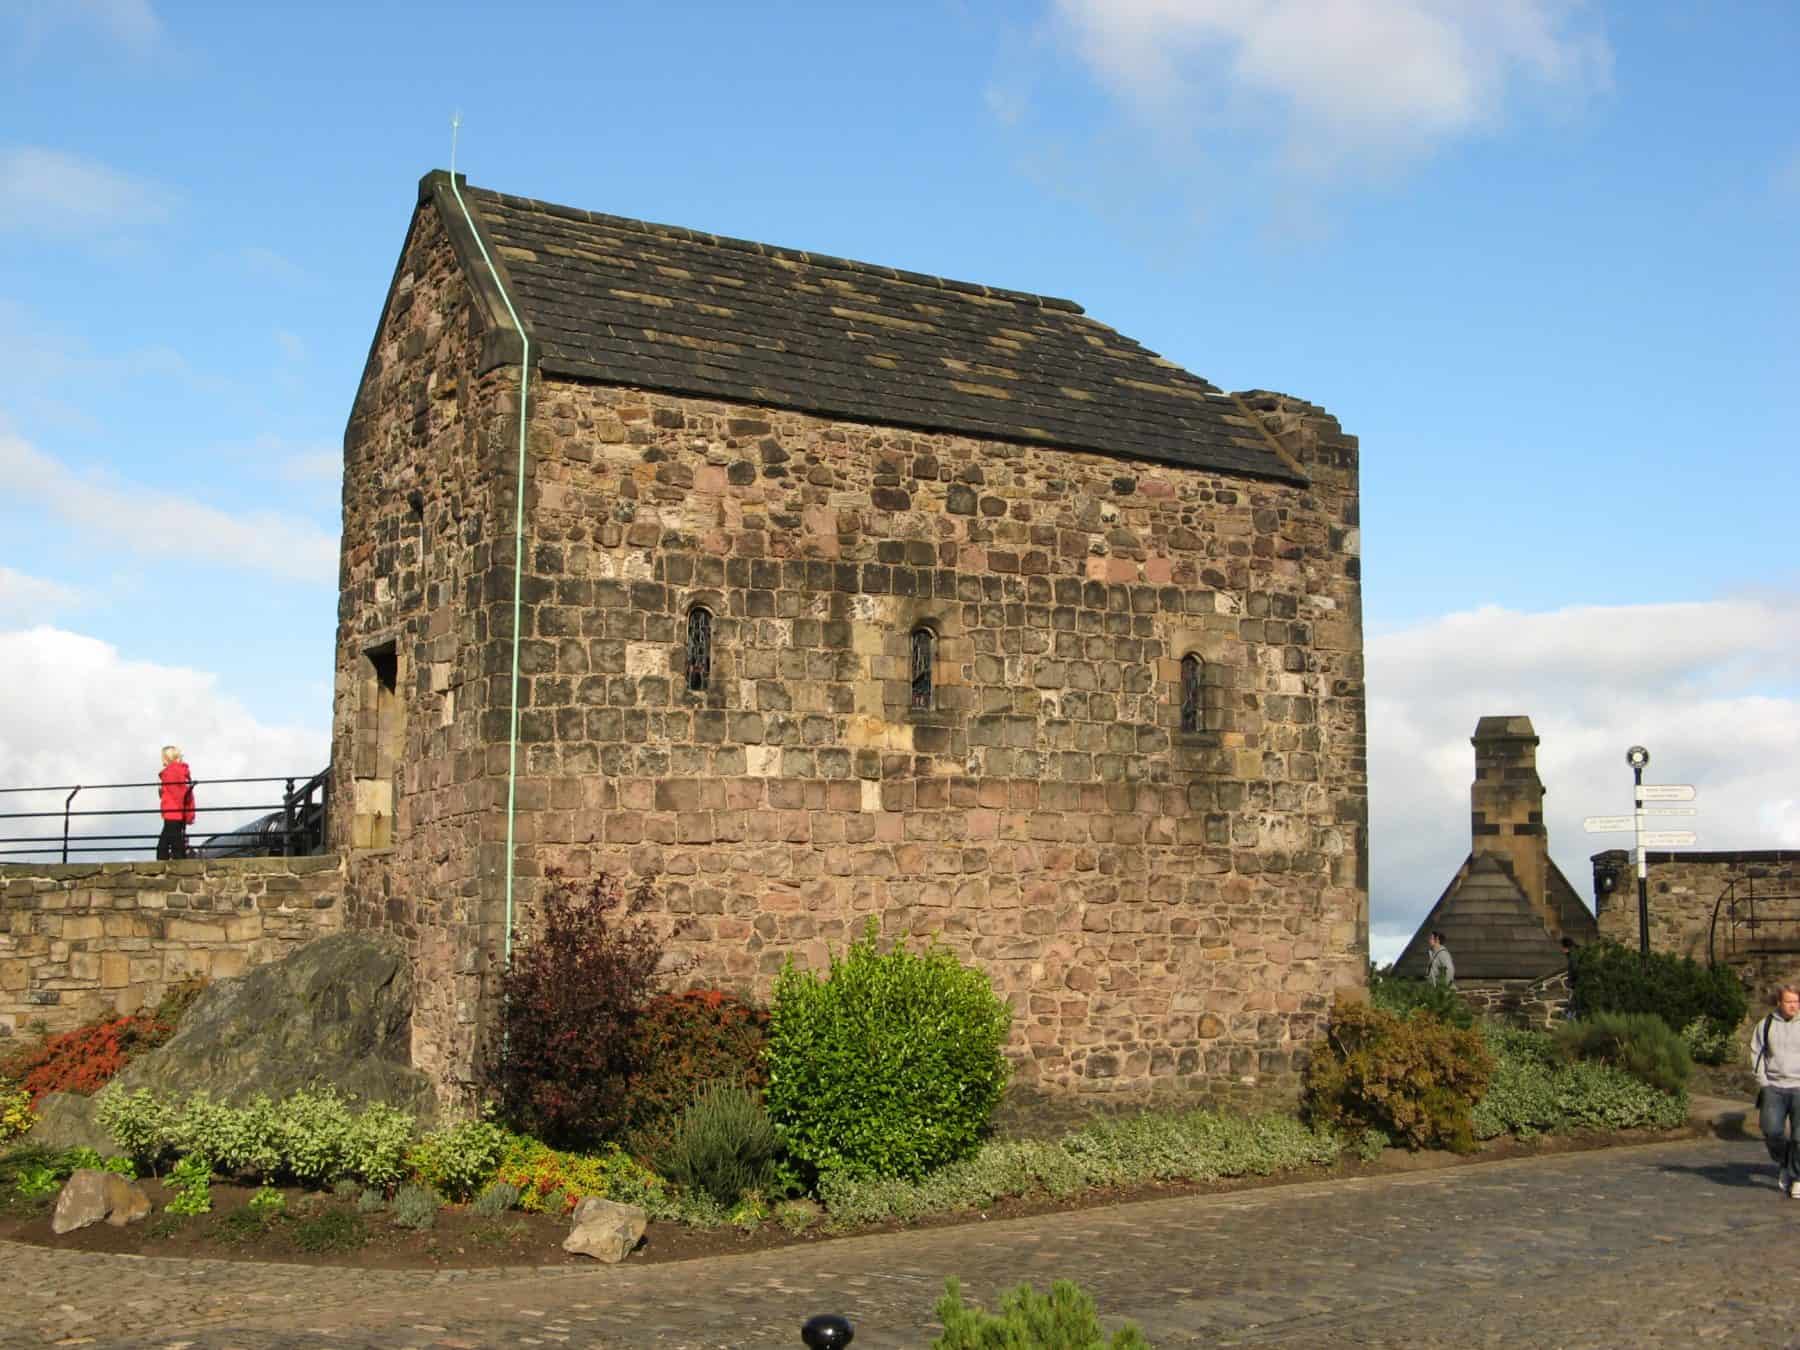
Queen Margaret, later canonized as St. Margaret, passed away at Edinburgh Castle in 1093, just days after learning of the deaths of her husband, King Malcolm III, and eldest son, Edward, on the battlefield.
Before entering the chapel, take a moment to observe the massive black cannon located outside.
STOP 25 - MON'S MEG
Before entering the church, let's meet Edinburgh Castle's most renowned resident: Mon's Meg.
This colossal cannon, weighing around 13,000 lbs or nearly 6 imperial tons, was crafted in Mons, Belgium in 1449 and gifted to King James II by Philip III, Duke of Burgundy.
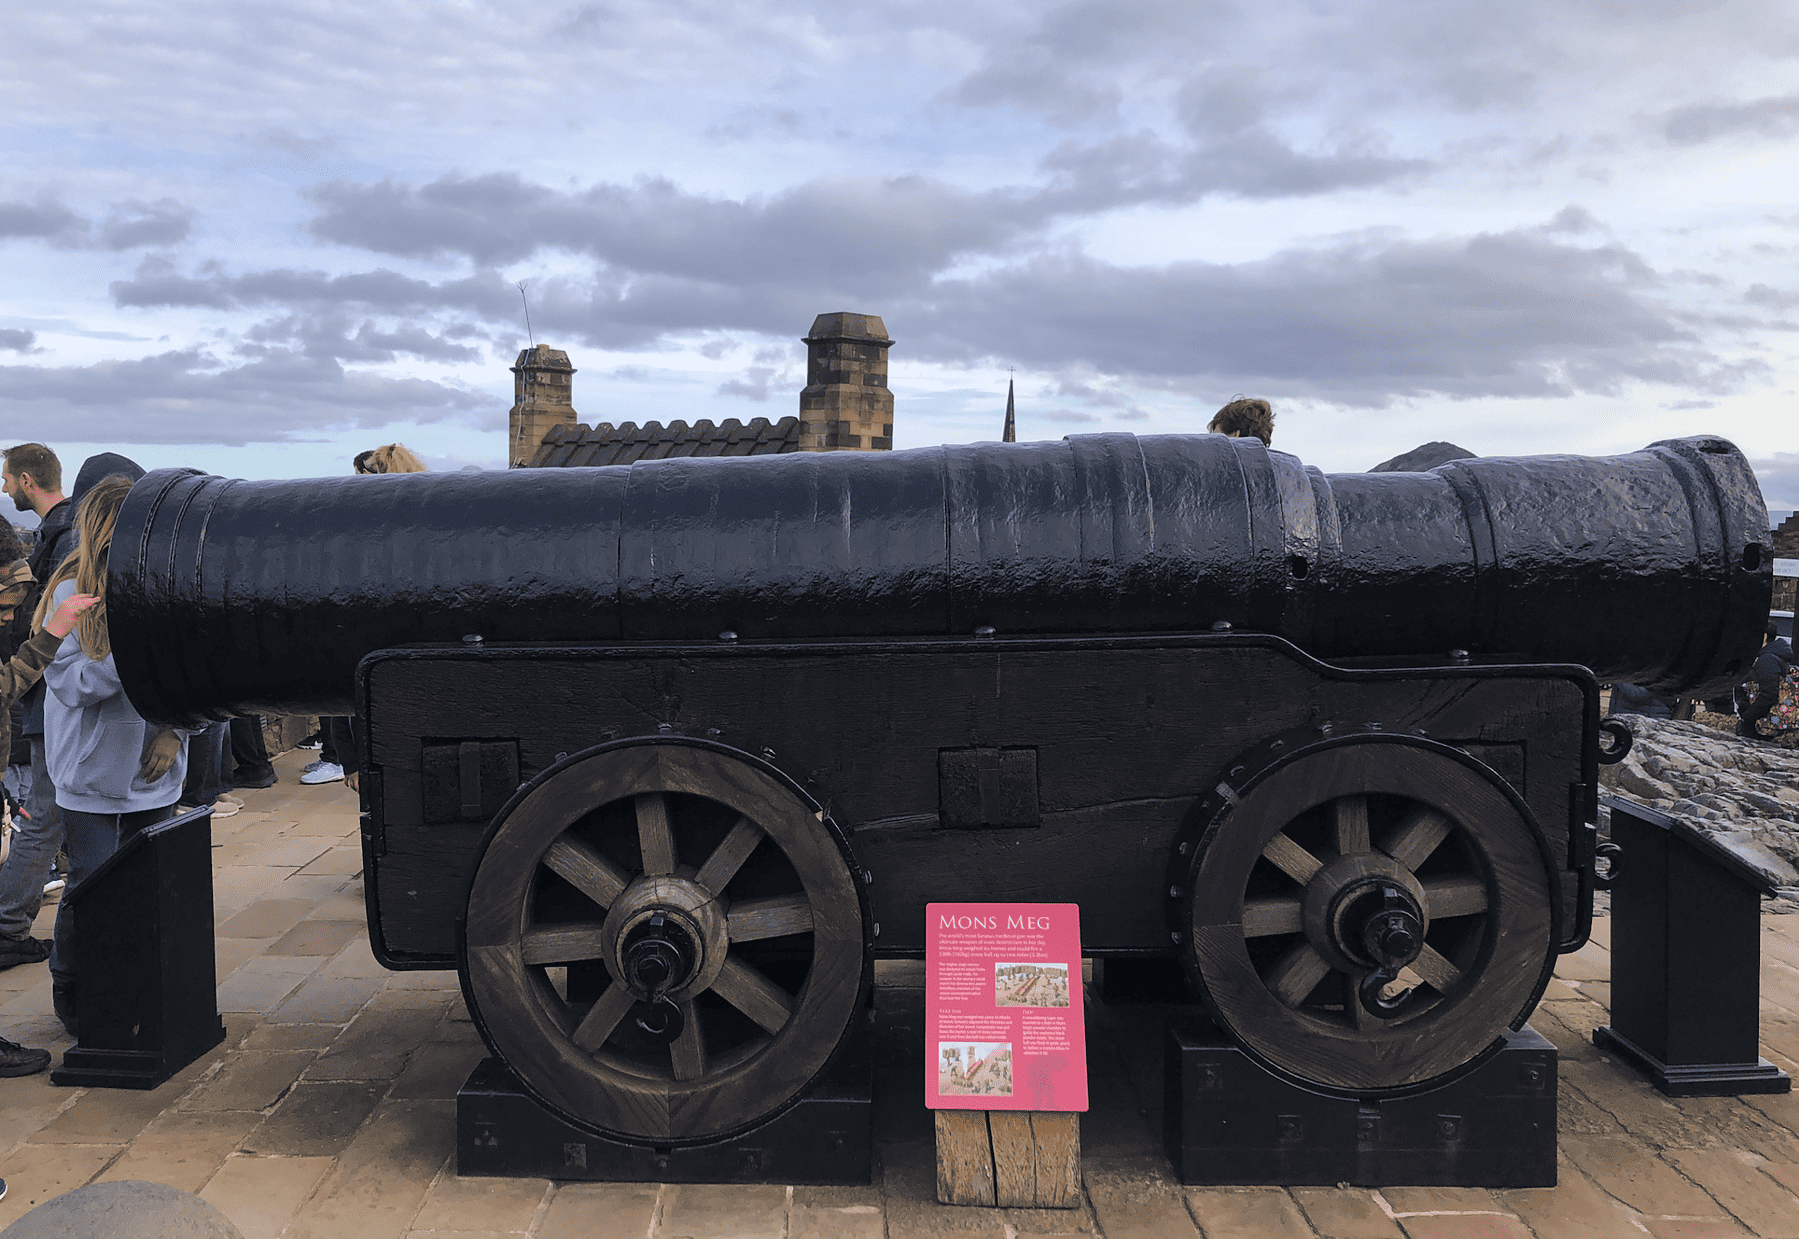
With a barrel width of over 1.5 feet, it could hurl a 330lb gunstone up to 2 miles.
Resting on a reconstructed carriage, Mon's Meg was designed to breach castle walls, instilling fear in defenders who often surrendered rather than face her power.
Although obsolete by the early 1500s, she continued to mark significant events with thunderous salutes until her barrel burst during a birthday celebration for the Duke of Albany in 1681.
Now, let's head inside St. Margaret's Chapel.
STOP 26 - ST MARGARET'S
Robert the Bruce spared only St. Margaret's Chapel when he ordered the destruction of Edinburgh Castle in 1314.
As you approach the chapel's entrance, notice a blocked doorway from the 17th or 18th century, evidence of its later use as a gunpowder storehouse.
Inside, despite its cramped dimensions, the chapel boasts exquisite stained glass windows crafted by Douglas Strachan in 1922, depicting figures like William Wallace and St. Columba, alongside a beautiful depiction of St. Margaret herself.
The original 12th-century ornate arch separating the nave from the chancel and the Victorian barrel-vaulted ceiling add to its historical charm, preserved and cared for by the St. Margaret's Chapel Guild.
After exploring the chapel, visit the display case housing a copy of St. Margaret's gospel book, attributed to her only miracle where the book emerged unharmed after falling into a river.
The original rests in the Bodlean Library in Oxford.
Interestingly, anyone named Margaret or with a derivative of the name can join the St. Margaret's Chapel Guild, with Princess Margaret as its inaugural patron and boasting over 300 members.
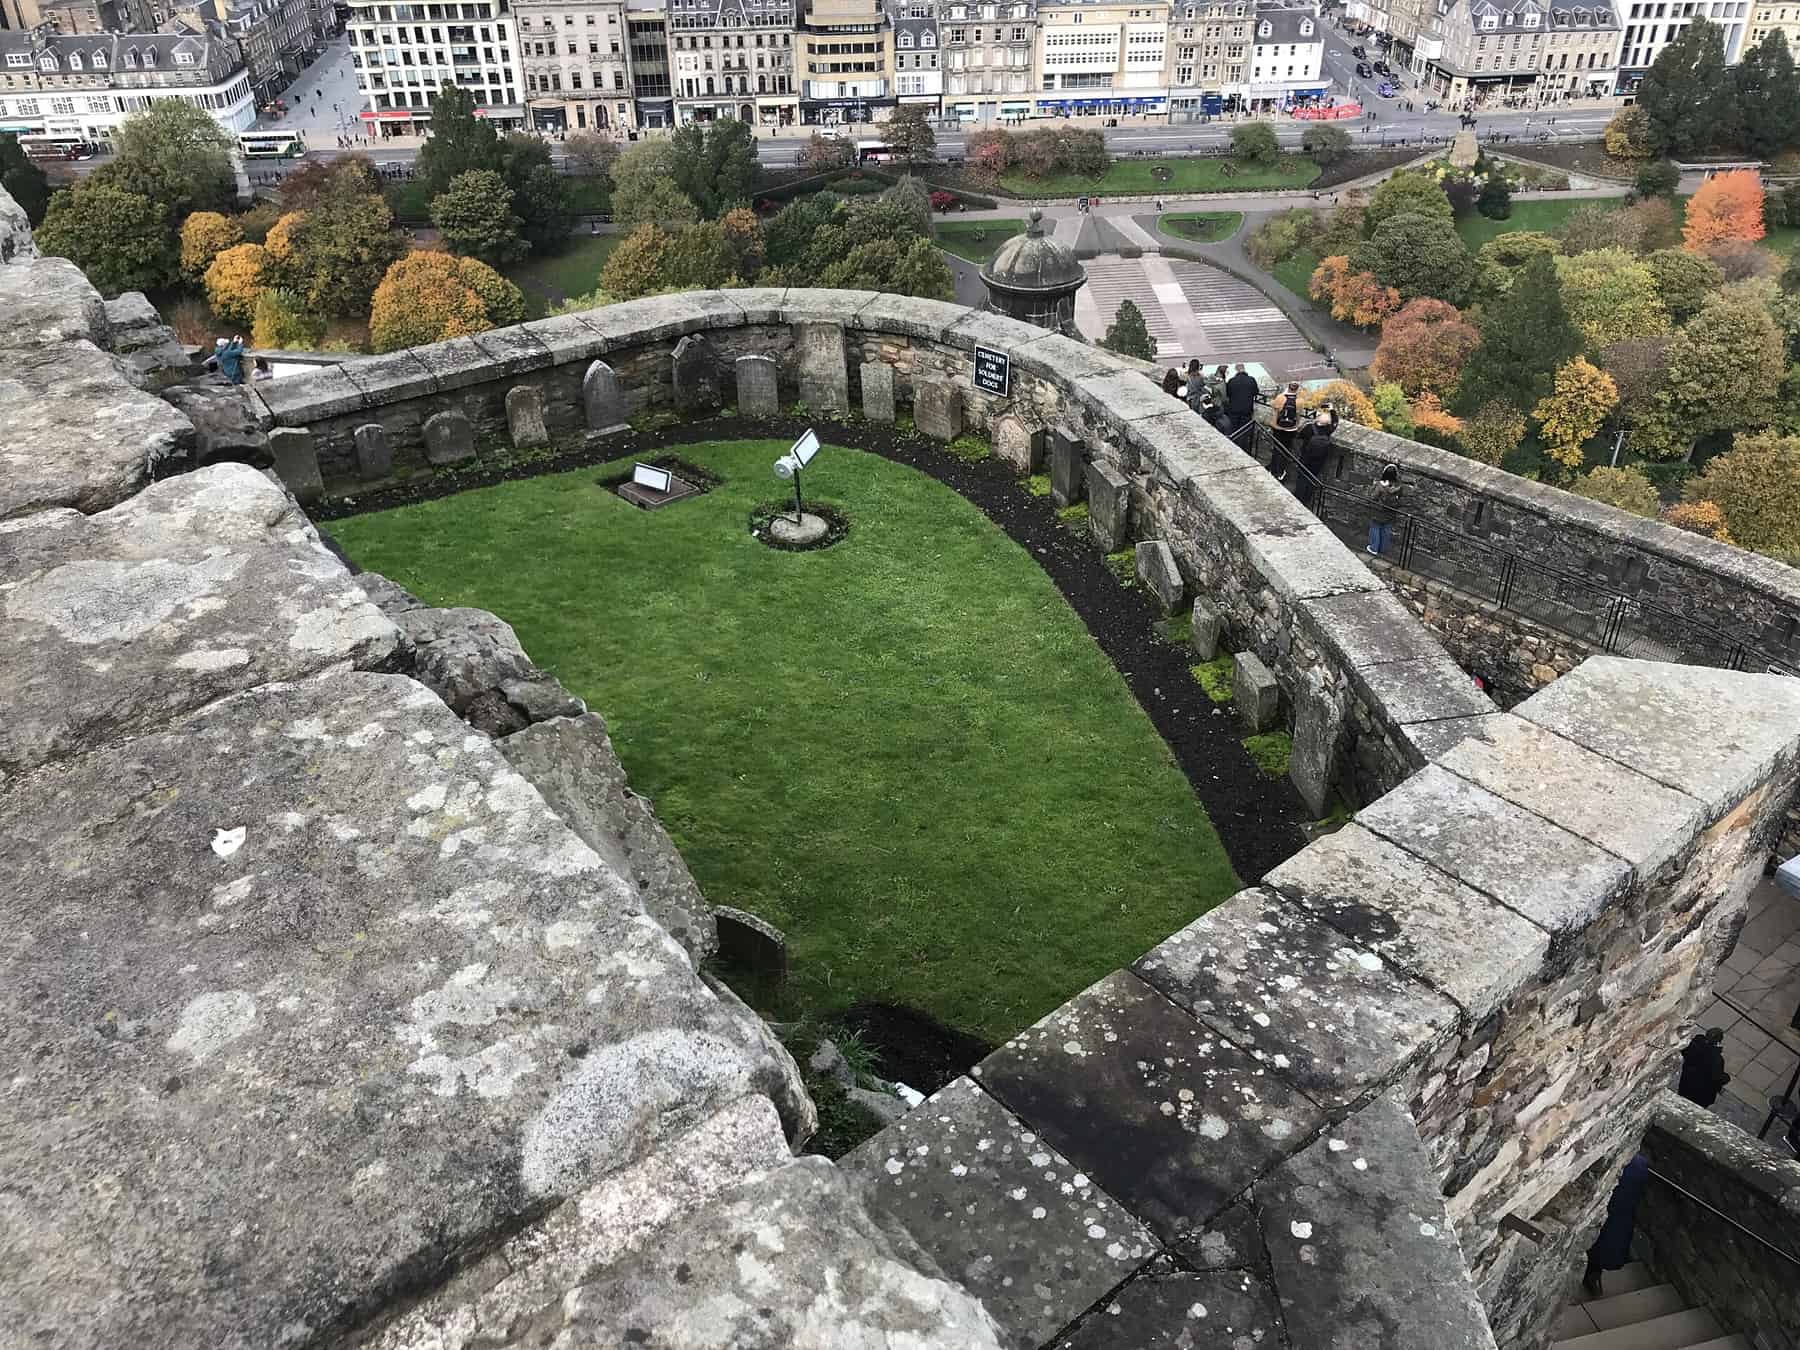
Exiting the chapel and descending the steps, take a moment to peer over the ledge for a view of the greenery below before proceeding.
STOP 27 - DOG CEMETERY
This 19th-century burial ground is a resting place for dogs, specifically those serving as regimental mascots or officer's pets.
While about 26 dogs are believed to be buried here, not all have headstones.
Some of the honored pets include Winkle, Gyp, Topsy, and Yum Yum.
Beyond the cemetery, you'll find a large staircase leading back down to the Argyle Battery.
Along the steps, you'll encounter the Argyle Tower, named after the Duke of Argyle, who was once held prisoner here.
Consider exploring the changing exhibitions inside the tower before proceeding down the stairs toward the Portcullis and Gatehouse.
As you walk, listen to the next clip, and stop when you reach the other side of the Portcullis, where you can see the red and gold lion rampant.
STOP 28 - THE ‘45
The Jacobite rising of 1745 marked the last siege of Edinburgh Castle, following the city's longest siege, the Lang Siege.
Led by Bonnie Prince Charlie, the Jacobite forces sought to acquire the Scottish crown jewels to bolster his claim to the British throne.
However, despite capturing Edinburgh easily, they encountered fierce resistance at the heavily defended castle, under the command of Deputy Governor George Preston.
Efforts to blockade the castle were met with indiscriminate firing, resulting in the cessation of the blockade due to civilian casualties.
Eventually, lacking the firepower to breach the castle walls, the Jacobites abandoned their siege on November 1, 1745, and Edinburgh Castle was never besieged again.
Interestingly, many of the Jacobites who failed to capture the castle later found themselves imprisoned within its walls after the rebellion was quashed.
While facing the gatehouse you've just passed through, turn left and gaze up the walls to discover a small memorial.
STOP 29 Kirkcaldy Memorial
As we gaze up the castle walls, just above where we've been, you'll notice a monument built into the wall.
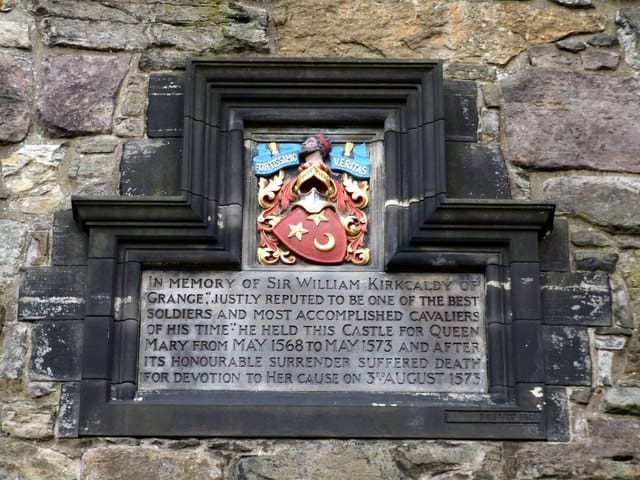
This plaque commemorates Sir William Kirkcaldy, whose courageous defense of the castle during the Lang Siege is remembered here.
It laments his eventual execution due to his steadfast resistance.
Now, turn away from the portcullis once more and begin making your way toward the exit, listening to the final clip as you go.
STOP 30 - EXIT
As we approach the Victorian Gatehouse, our visit to Edinburgh Castle is drawing to a close.
I want to express my gratitude to all of you for joining me today. I hope you found the tour enjoyable and informative.
Before you exit, take a moment to look up at the walls you just traversed.
From this vantage point, you can see the rocky remnants of the 14th-century towers and the imposing Half Moon Battery above.
Consider the countless stories embedded in these ancient stones—it has been a pleasure to share some of them with you today.
Thank you for choosing Free Tours By Foot for your Edinburgh Castle exploration today.
We hope you've enjoyed every step of your journey.
